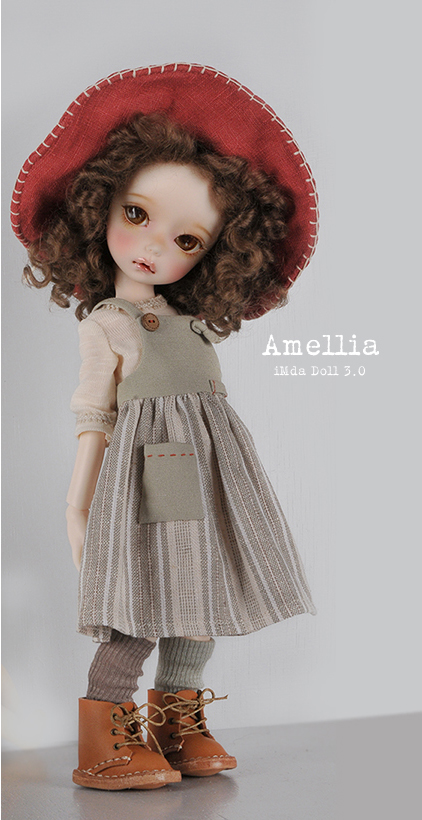
Jumper skirt set - Making process
|
필요한 재료
원단
스커트용 : 45 * 30 가량.
티셔츠용 : 40 * 12 가량. 신축성이 있는 원단.
모자용 : 50 * 25 가량. 튼튼하고 힘이 있는 원단.
양말용 : 15 * 12 가량. 신축성이 있는 원단.
레이스 : 약 30cm.
공예용 철사 : 약 50cm.
스냅단추 : 0.5-0.6cm 사이즈 3개.
진주구슬 : 작은 사이즈 2개.
그 외 장식용 나무단추 1개, 자수실 등 장식용 재료. 샘플로 사용된 자수실의 색상은 ecru.
기타 : 실, 바늘, 자, 가위 등 재봉에 필요한 기본도구
Materials:
* Fabrics
-For skirt: 45*30
-For t-shirt: 40*12 (flexible fabric)
-For hat: 50*25 (strong and hard fabric)
-For socks: 15*12 (flexible fabric)
* Lace: about 30cm
* Wire for crafts: about 50cm
* 3 Snap buttons: 0.5-0.6cm size
* 2 small beads
* 1 wood button for decoration, embroidery
thread, other decorative materials…etc.
* Threads, needle, ruler, scissors…etc.
패턴을 원단위에 놓고 수용성 펜 등을 이용하여 옮겨그린다. 시접은 기본적으로 0.5cm이며 설명과 사진을 참고하여 시접을 그리고 잘라낸다.
Draw the patterns on a fabric using water-based
pen. A margin to seam is basically 0.5cm. Please mark the margin to seam and
cut it. |
|
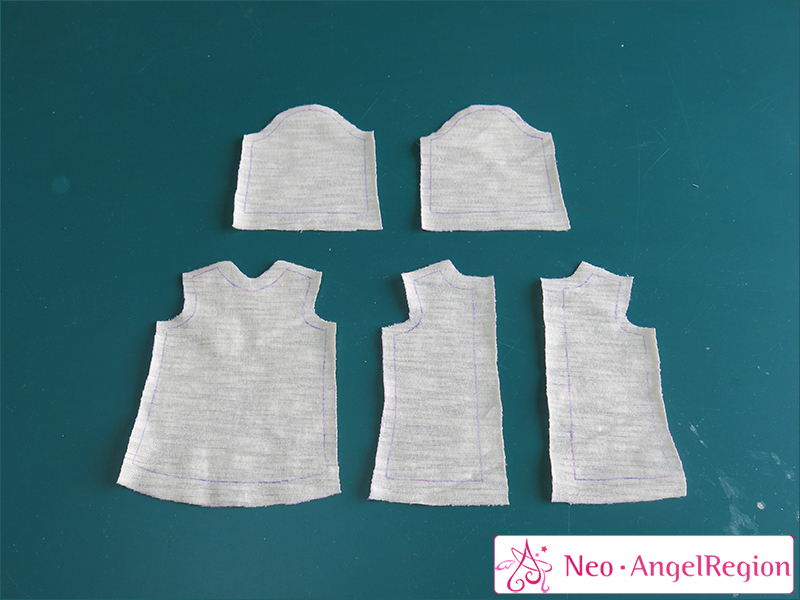
셔츠만들기. 사진을 참고하여 재단한다. 목둘레는 시접을 0.7cm, 소맷단과 밑단, 뒷중심선은 시접을 1cm 남긴다.
Making
a shirt. Please refer to the photo and cut the fabrics. (The margin to seam for
a neck circumference is about 0.7cm / margins to seam of sleeves, bottom, and a
back center-line are about 1cm) |
|
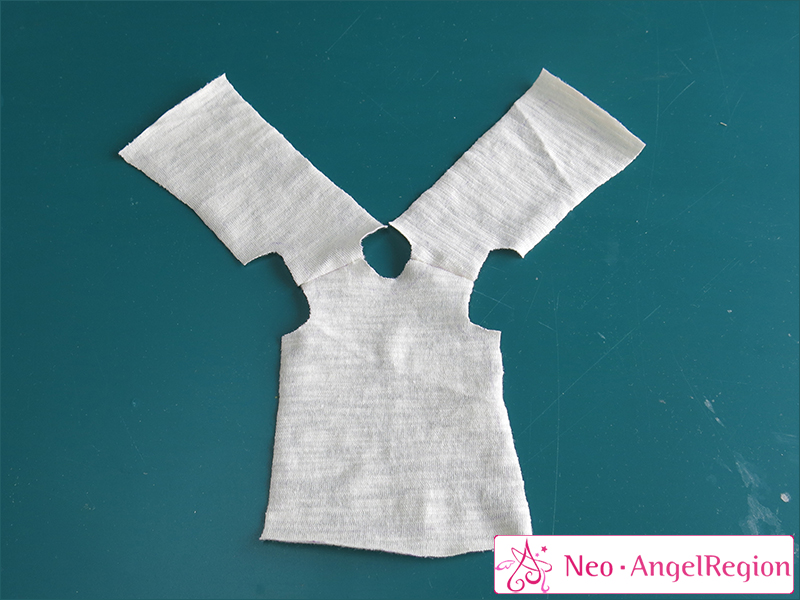
어깨선을 연결하고 어깨선의 시접을 갈라놓는다.
Sew the shoulder lines and divide the
margin to seam. |
|
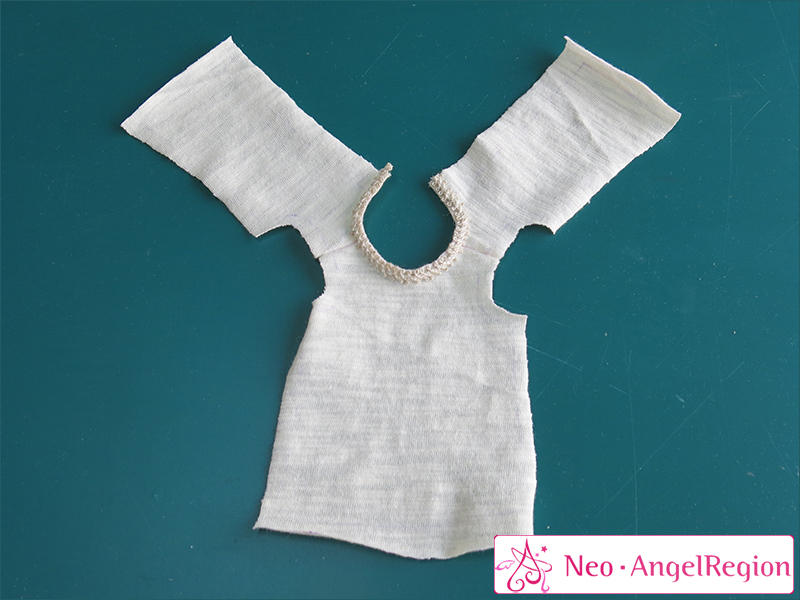
목둘레를 접어서 임시고정한 후 레이스를 올려 고정한다. 목둘레를 접을 때 당겨지는 부분은 가위집을 넣어가며 접는다.
Fold
the neck circumference, and fix it with a lace. |
|
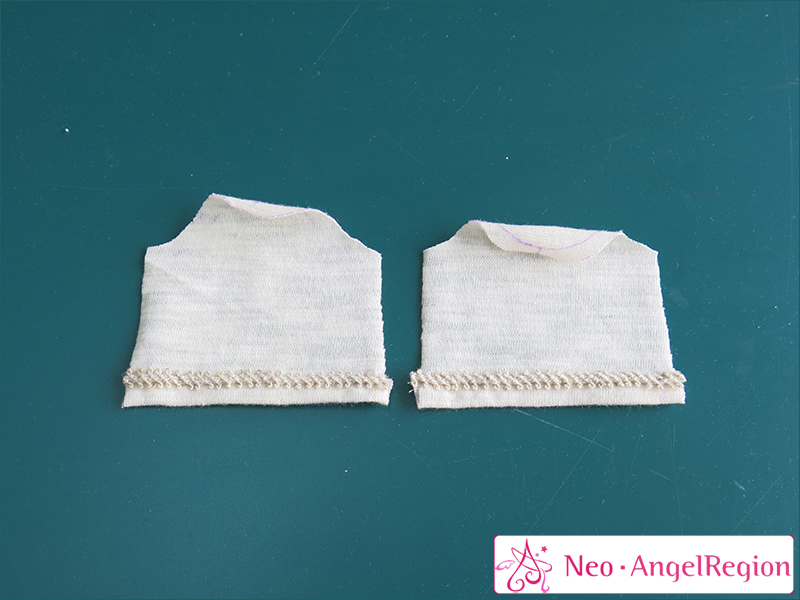
소맷단은 목둘레와 마찬가지로 접어서 레이스를 올려 고정한다.
Fold the sleeves and fix with lace like you
did for the neck circumference |
|
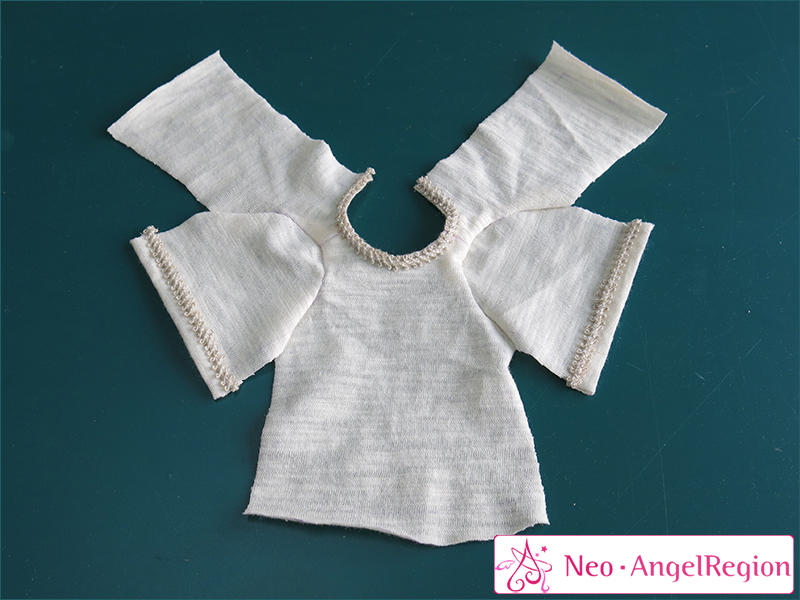
소매의 중심표시지점과 어깨선을 잘 맞추어가며 소매와 몸판을 연결한다. 연결이 어려울 때는 몸판쪽 시접에 가위집을 넣어가며 연결한다.
Sew sleeves and body parts. |
|
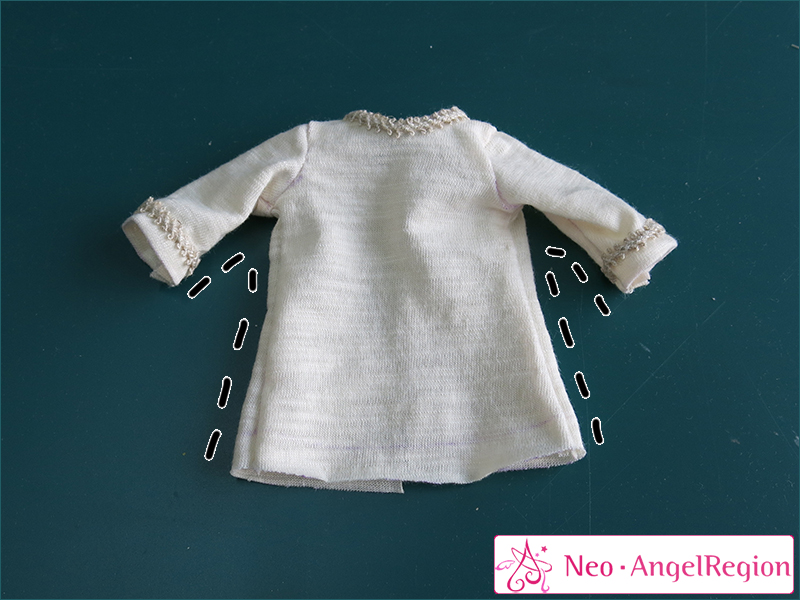
소매 옆선과 몸판 옆선을 각각 연결하여 셔츠의 형태를 만든다.
Sew the sides of sleeves and body parts. |
|
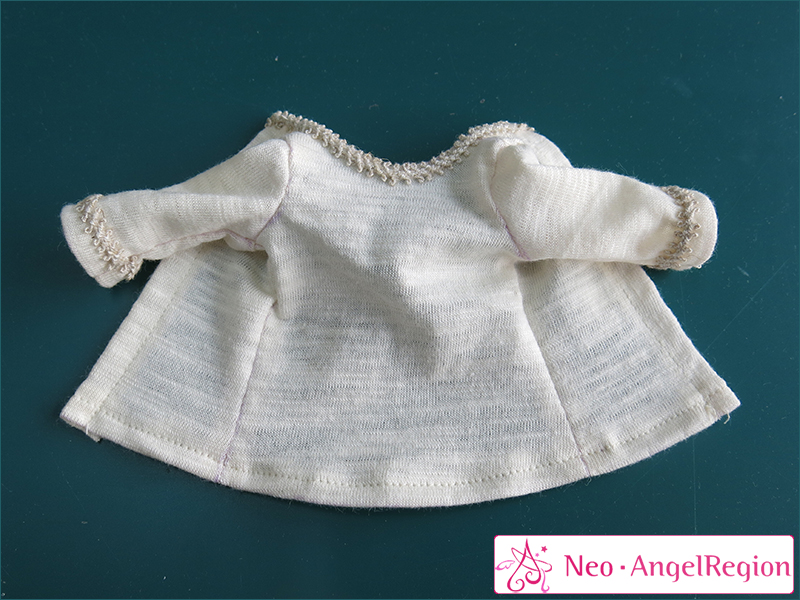
뒷중심선과 밑단의 시접을 접어 고정한 후 뒷중심에 스냅단추를 3개 달아 완성한다.
Please fold the margin to seam of back
center-line and bottom, and sew. And then put on 3 buttons to completion. |
|
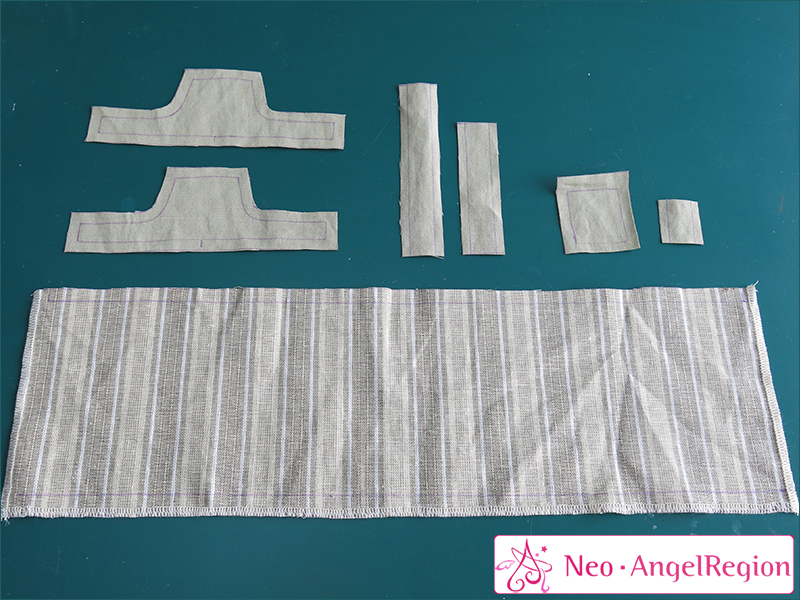
점퍼스커트 만들기. 패턴과 설명을 참고하여 사진과 같이 재단한다. 치마의 경우 치맛단은 1cm, 나머지는 0.7cm의 시접을 남긴다. 치마 상의의 경우 아랫단에 시접 0.7cm를 남긴다. 어깨끈과 장식은 패턴에 기재된 재단사이즈대로 재단해 둔다. 주머니는 위쪽 시접을 1cm 둔다.
Making
a jumper skirt: Please refer to patterns and photo, and cut the fabrics. (A
margin to seam for a hem of skirt: 1cm / margins to seam for the rest parts of
the skirt: 0.7cm / 0.7cm of margin to seam for bottom of the skirt / 1cm of
margin to seam for the upper side of a pocket) |
|
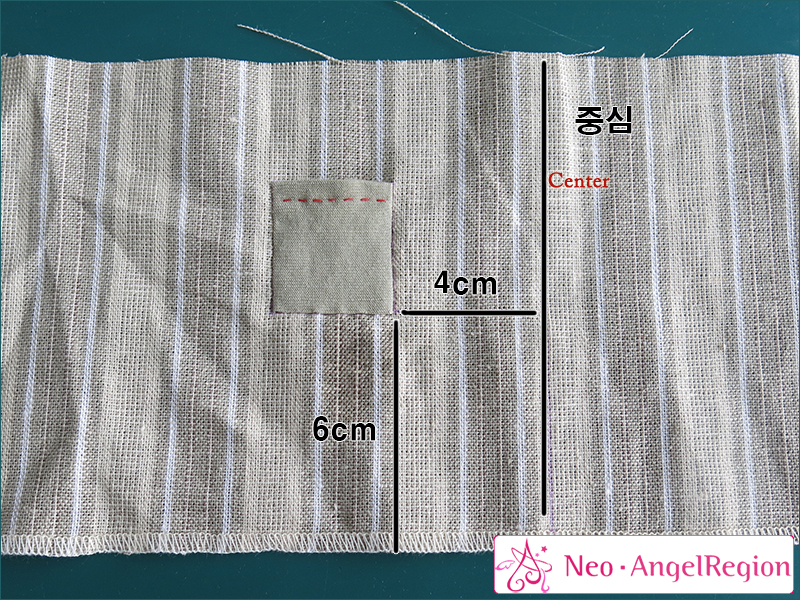
주머니의 윗부분을 접어 스티치로 고정한 후 사진의 위치에 공그르기로 고정한다. 공그르기가 어려우면 주머니 입구와 마찬가지로 스티치로 고정해도 좋다.
Please
fold the upper part of the pocket and sew like the photo. |
|
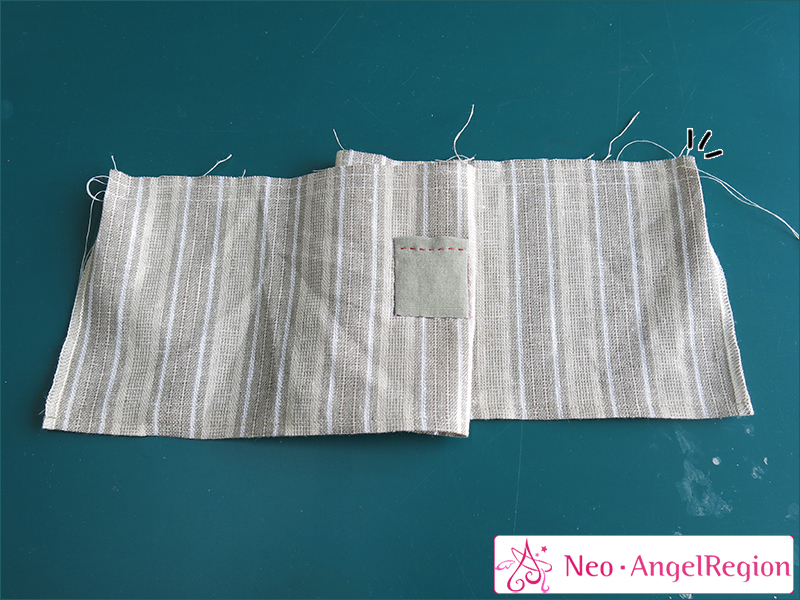 . .
밑단을 접어 고정한 후 윗단에 주름을 잡기 위한 바느질을 해둔다. 이 때 뒷중심의 시접을 접어서 바느질한다.
Please fold the bottom part and fix, and
after this, sew to put a crease on the upper part. (Fold the margin to seam
of a back center-line and sew) |
|
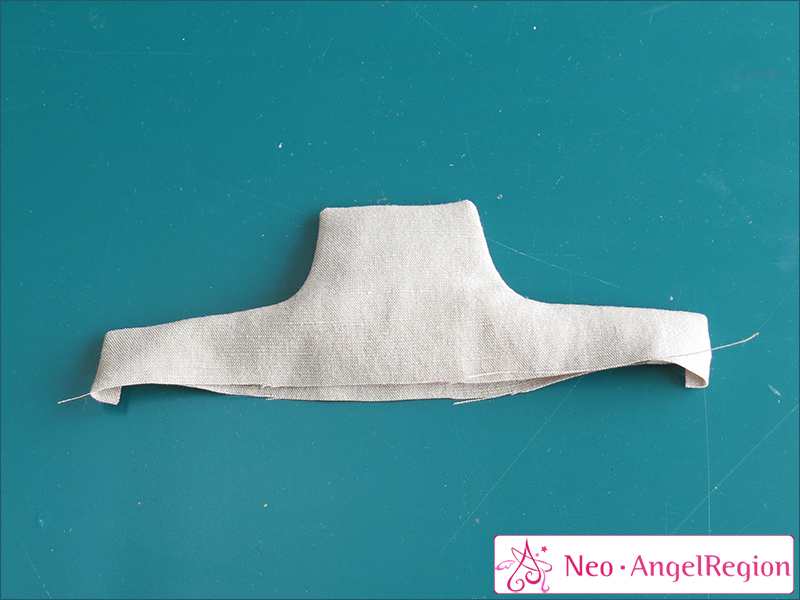
상의 부분을 겉끼리 마주보게 겹치고 밑단을 제외한 부분을 박은 후 뒤집는다. 이 때 안감의 밑단 양끝을 미리 안쪽으로 접어서 박아도 된다.
Please
sew top parts each other except the bottom part. |
|
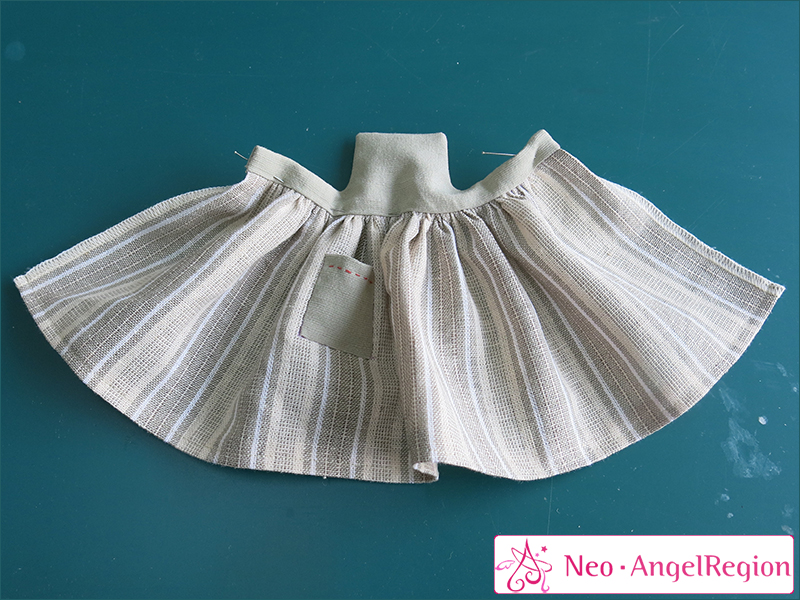
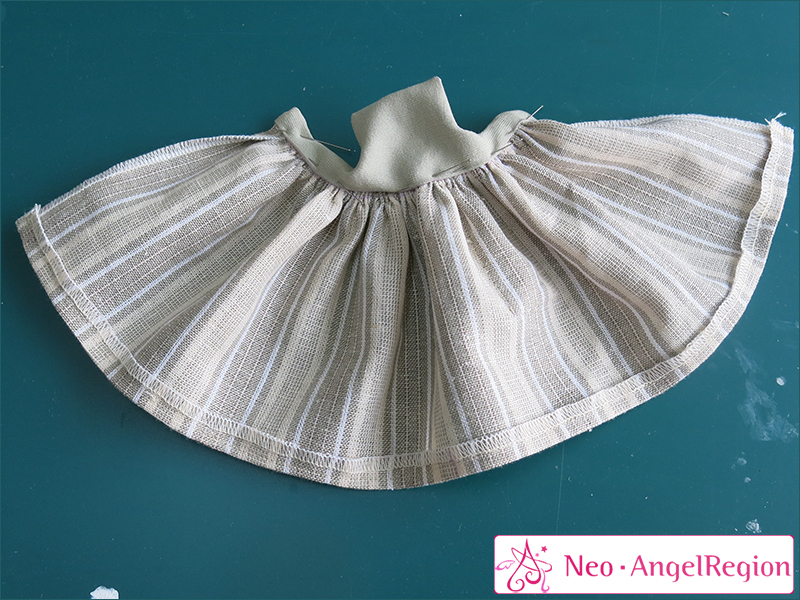
치마에 주름을 잡아 상의의 겉감 밑단과 중심을 잘 맞추어 연결한다. 시접은 상의의 안으로 꺾어넣고 안감의 시접을 안으로 접어넣는다.
Please
sew the top and skirt. |
|
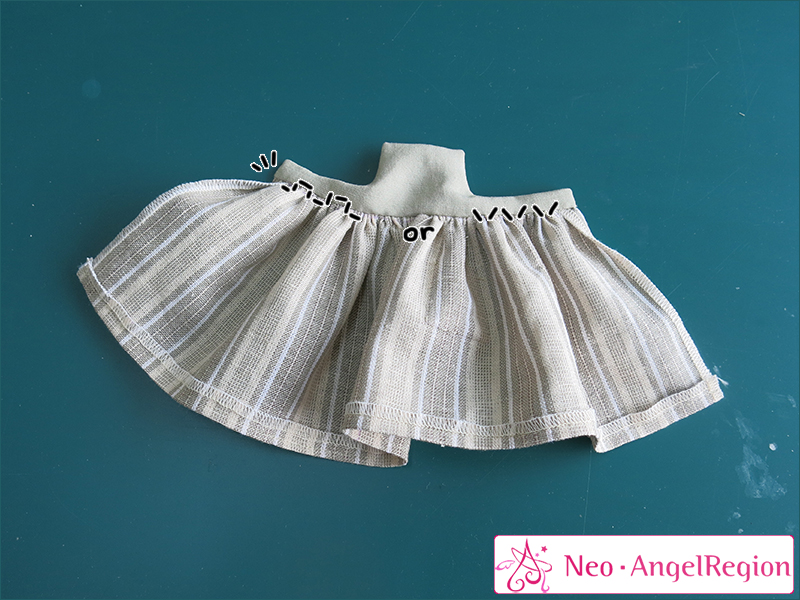
감침질이나 공그르기로 접어넣은 시접을 고정한다.
Like
the photo. |
|
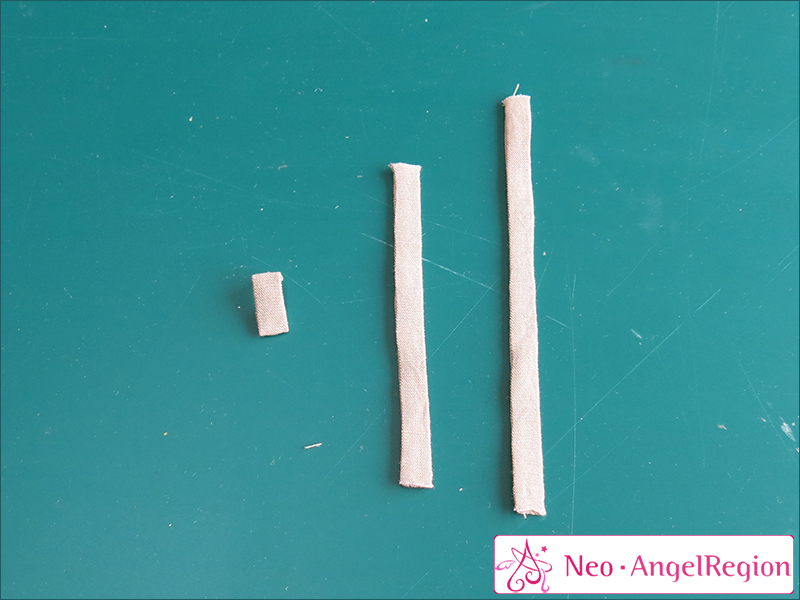
어깨끈과 장식끈을 만든다. 어깨끈은 반으로 접은 후 0.5cm 시접을 두고 박아서 뒤집는다. 끝처리는 하지 않아도 좋지만 가능한 한 깔끔하게 잘라둔다. 장식끈은 반으로 접어 어깨끈과 마찬가지로 0.5cm 시접을 두고 박아서 뒤집은 후 양끝을 각각 0.5cm 접어 1.5 길이로 만든다.
Please make shoulder straps and a
decorating strap. Please fold the shoulder strap in half and leave 0.5cm of
margin to seam, and sew and turn it inside out. Fold the decorating strap in
half, and leave 0.5cm of margin to seam, sew and turn it inside out as well. Then
fold the both ends 0.5cm so that it can be 1.5cm length. |
|
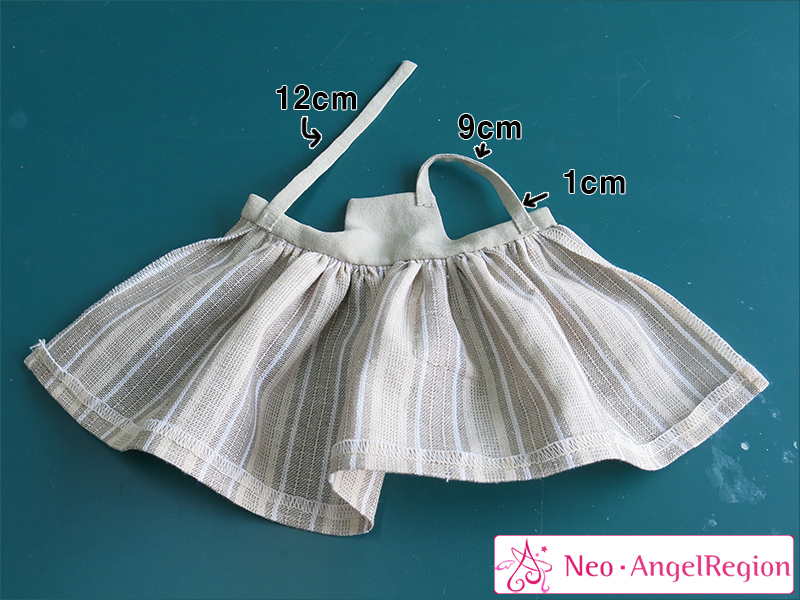
사진을 참고하여 어깨끈을 안쪽에서 고정한다.
Please
refer to photo and sew the straps. |
|
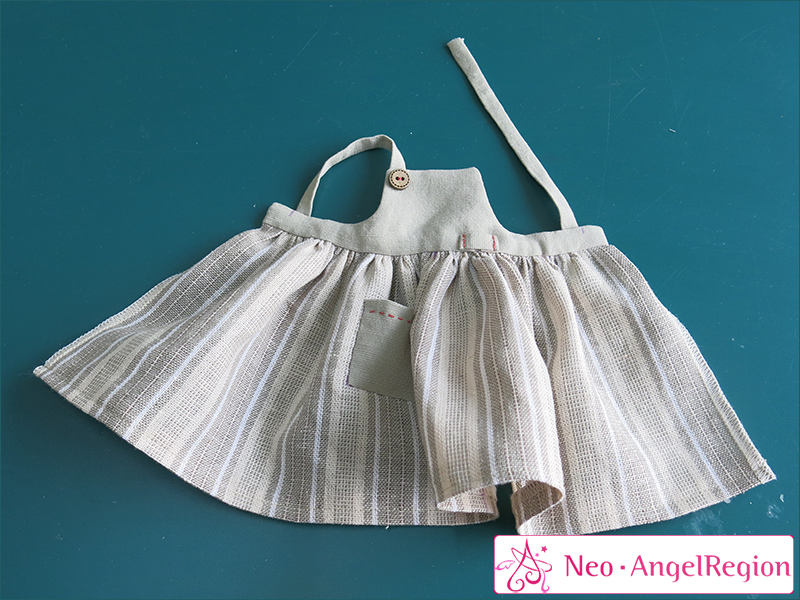
사진을 참고하여 장식끈과 장식단추를 달아준다.
Please refer to photo and put on a button
and decorating strap. |
|
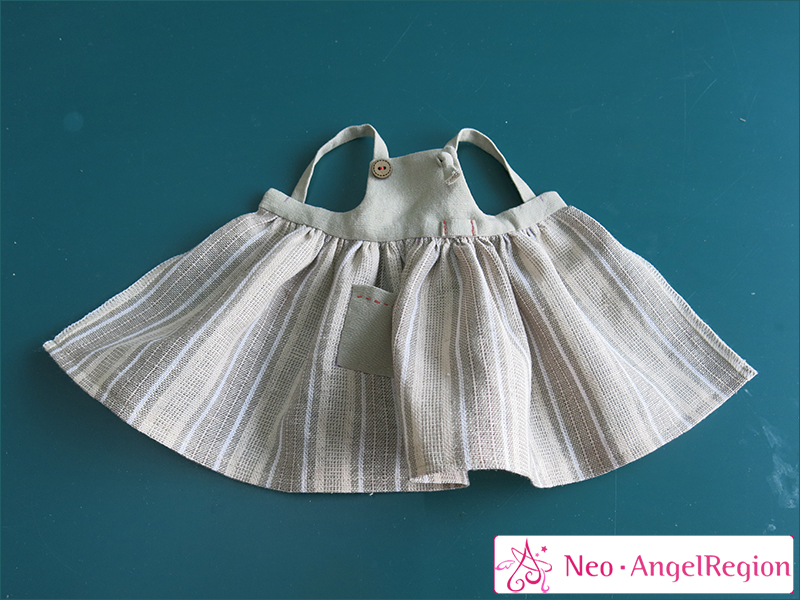
반대쪽과 대칭이 되는 위치에 송곳으로 구멍을 내고 끈을 통과시킨 후 매듭을 지어 고정한다. 송곳이 원단의 올을 끊으면 원단이 풀어질 수 있으므로 올과 올 사이를 지나갈 수 있게 조심스럽게 구멍을 낸다. 올이 잘 풀어지는 원단은 목공본드나 풀 등을 발라 구멍을 고정하거나 구멍을 내지 않고 끈을 바느질로 고정한다.
Make
a hole by an awl, and make the shoulder strap go through the hole. Then please
tie knot to fix. |
|
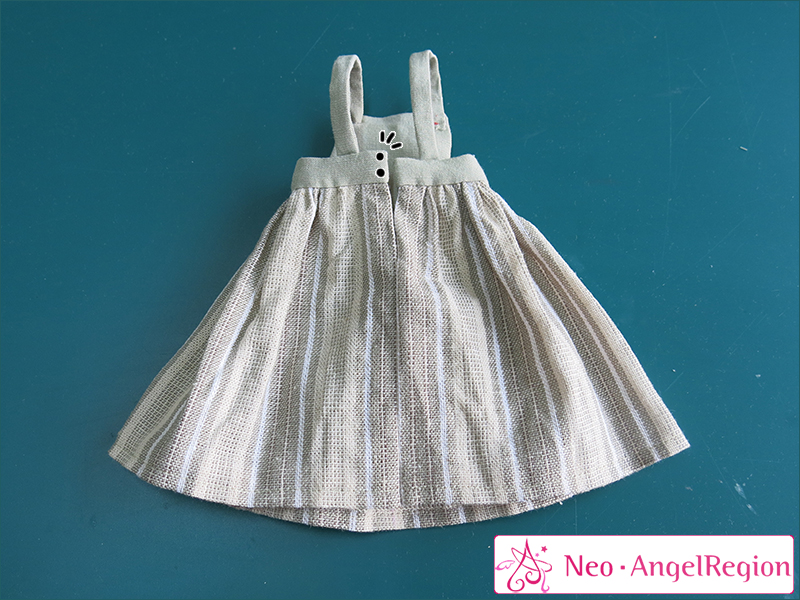
뒷중심을 연결하여 시접을 가르고 허리부분에 진주단추와 실고리로 잠금장치를 달아 완성한다.
Please connect the back center-line and
finish it by putting buttons. |
|
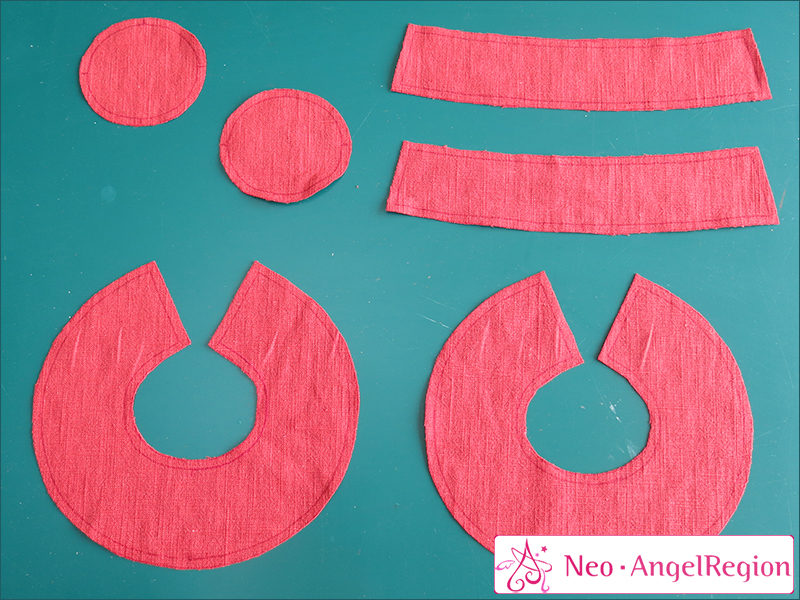
모자만들기. 사진을 참고하여 재단한다.
Making a hat. Please refer to the photo and
cut the fabric. |
|
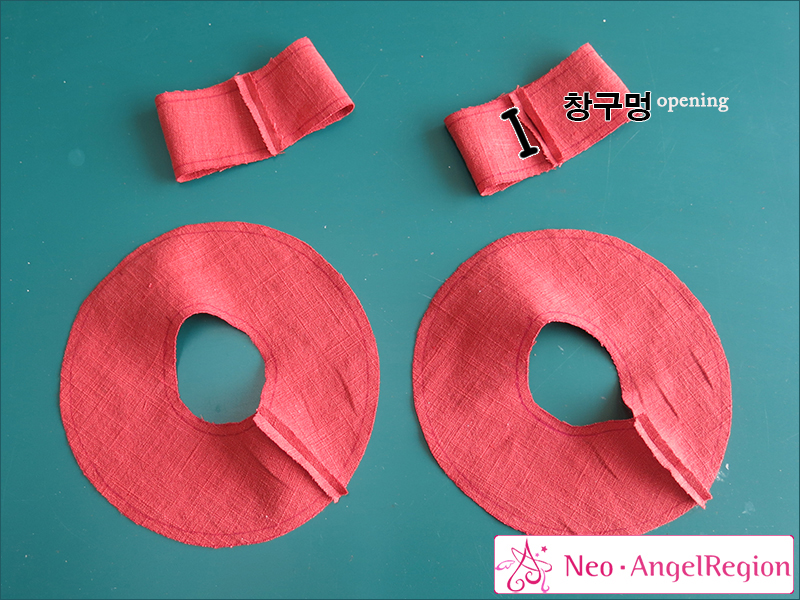
모자의 옆면과 챙을 각각 사진과 같이 연결한다. 이 때 안감이 될 옆면은 위아래만 고정하고 중간을 비워 창구멍을 만들어둔다.
Please connect and sew
each side of the side and a visor of a hat. |
|
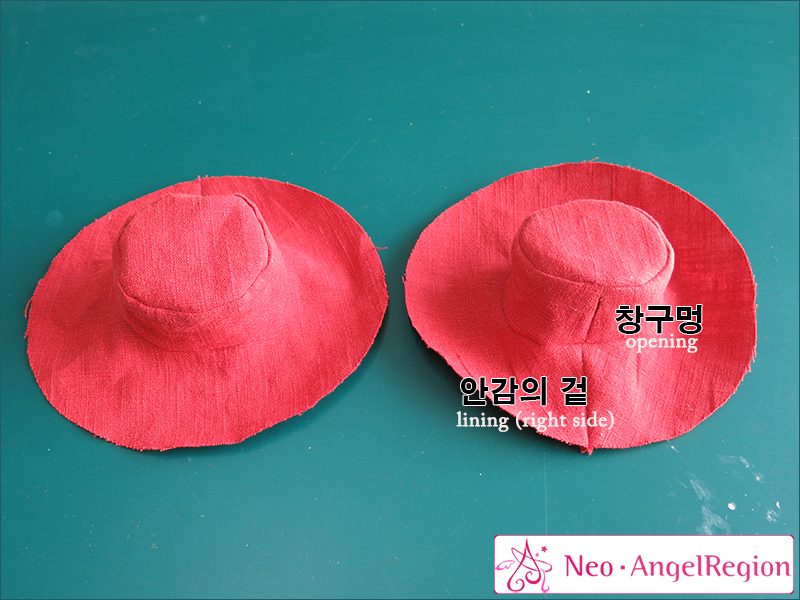
안감과 겉감을 각각 모자 형태로 연결한다. 어려운 부분은 시접에 가윗집을 넣어가며 연결한다.
Please
connect the inner fabric and outer fabric, and sew them like the photo. |
|
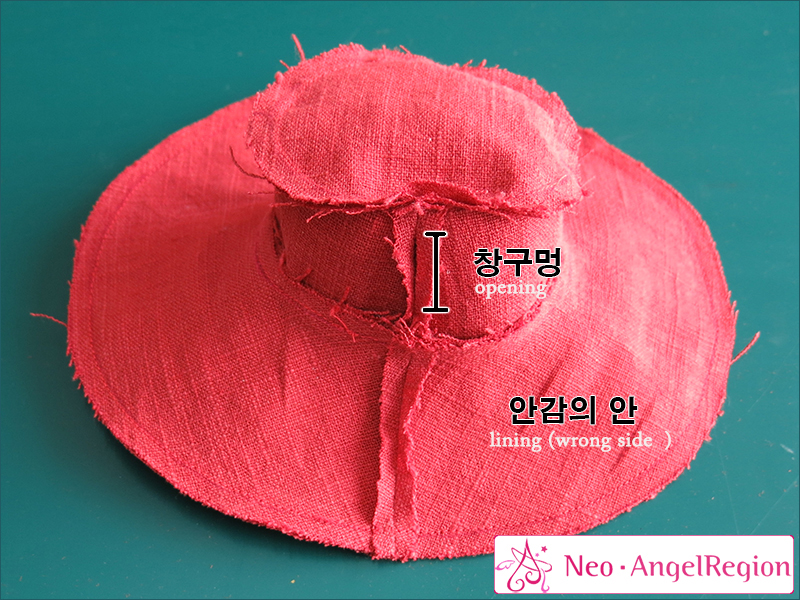
안감과 겉감을 겉끼리 마주보게 겹쳐놓고 챙을 빙 둘러 돌아가며 끝까지 박는다.
Please out each
outside of the inner fabric and outer fabric facing each other |
|
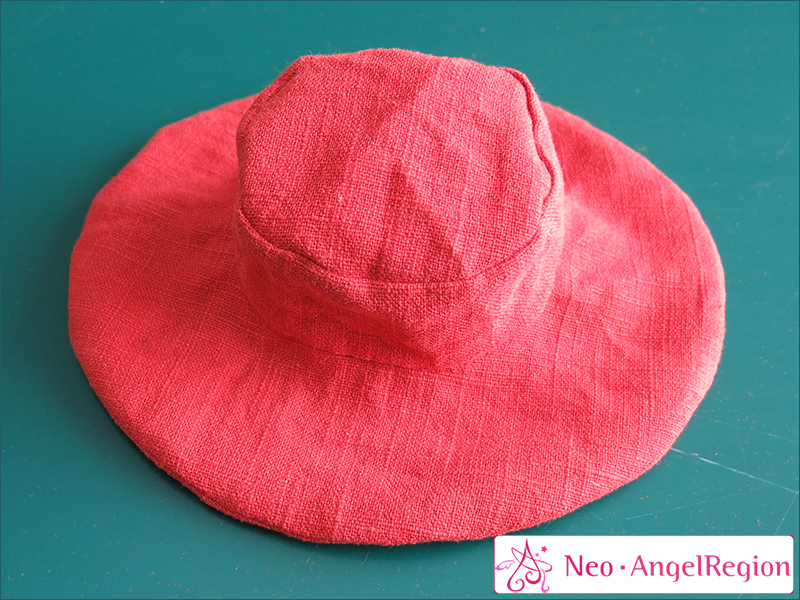
안감 옆면에 있는 창구멍으로 모자를 조심스럽게 뒤집어 모양을 정리한다.
Please turn the hat inside out. |
|
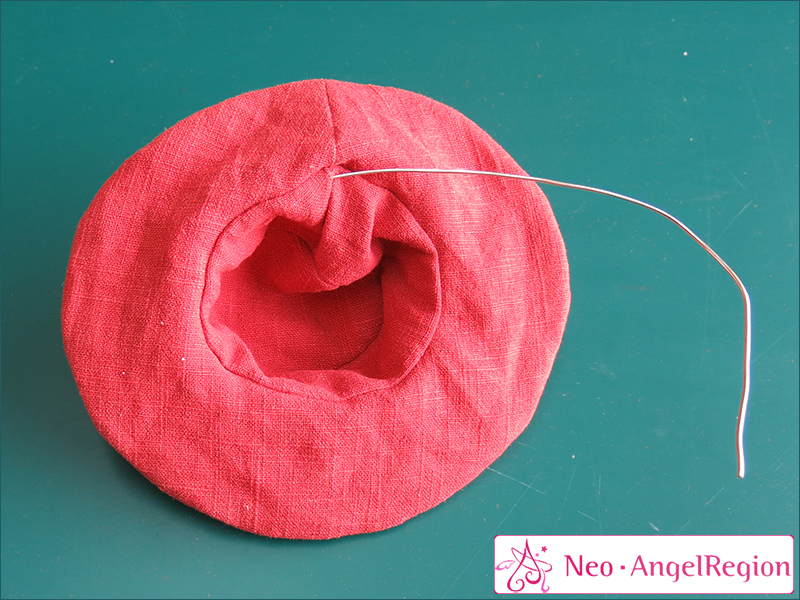
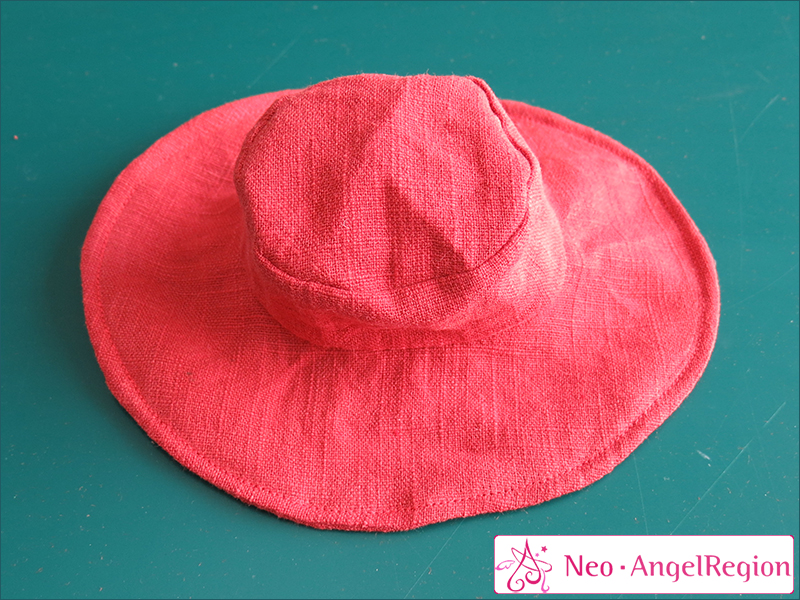
창구멍으로 공예용 철사를 집어넣어 모양을 잡은 후 철사 옆으로 바짝 붙여서 박아준다.
Put a wire through the opening, and then hold shape, and please sew
it. |
|
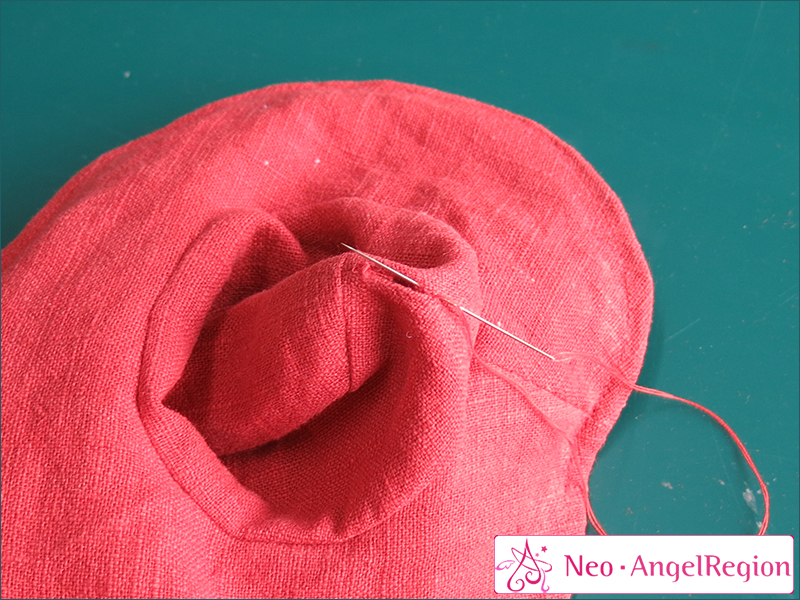
창구멍을 감침질이나 공그르기로 막아준다.
|
Please sew the opening to close.
|
|
|
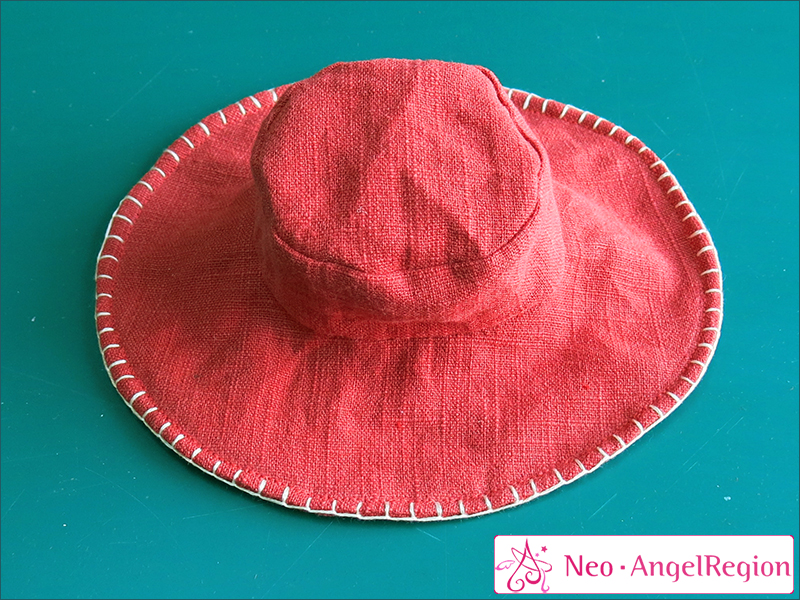
자수실 4올로 버튼홀 스티치를 놓아 완성한다.
Finish it by decorating with embroidery
thread. |