Outer dress - Making
process
|
|
2011. 2. 1.
|
|
 Click 100%
|
|
Pattern
PDF File (upload
2019.1.28.)
|
|
아우터 드레스 만들기
Making an Outer dress
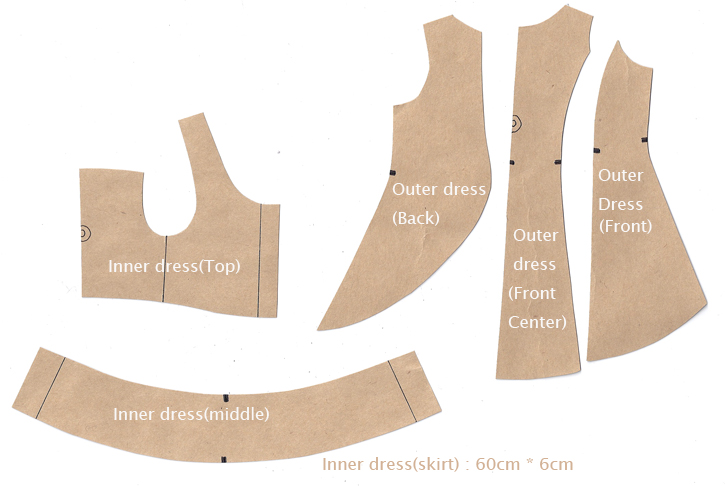
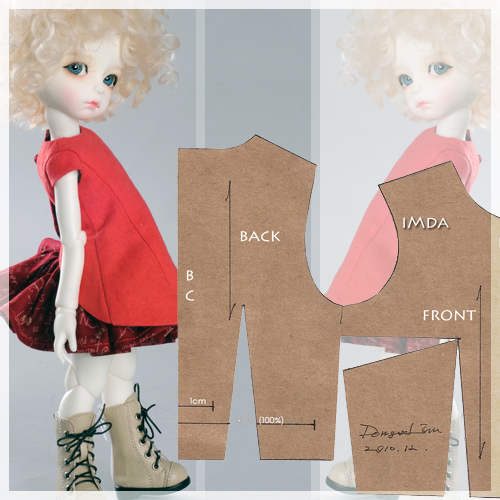
패턴:
Outer dress Front center, Front, Back, Sleeve
Pattern: Outer dress Front center, Front, Back, Sleeve
|
|
|
|
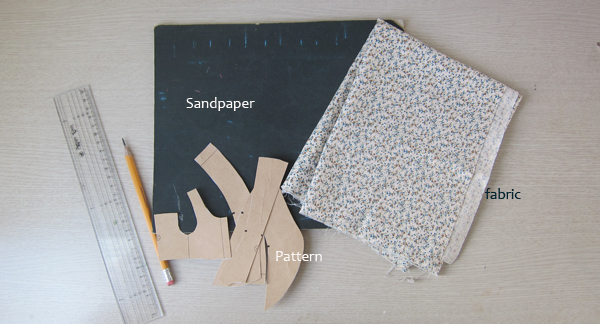
준비물:
① 제도판 (제도판이 없을 경우 사포를
하드보드지에 딱풀로 붙여서 만들어 둠)
② 원단: 패키지에는 레드
코튼 원단이 들어있겠지만, 시연을 위해 밝은 원단을 사용함.
③
패턴: 초보자를 위해 시접을 제외한 패턴을 사용(상급자는 시접포함
패턴 사용할 것)
④ 쵸크펜: 여기에서는 잘 보이기 위해서 연필을
사용
⑤ 시접자: 없는 경우 일반 자를 사용할 것
Prepare
1. Drawing board (If you don't have a drawing board, prepare it that sandpaper pastes on hardboard instead of a drawing board).
2. Fabric: There is red cotton fabric in package, but I used bright fabric to explain.
3. Pattern: I used pattern without a margin to seam for beginner (expert use pattern with a margin to seam.)
4. Chalk : I used pencil to explain.
5. Ruler for a margin to seam or normal ruler.
|
|
|
|
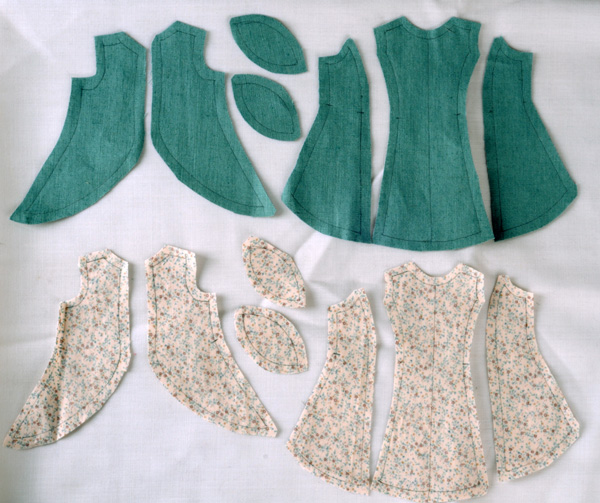
1. 제도판(사포) 위에 원단을
뒤집어 놓고 패턴을 그린다.
Turned over fabric on the drawing board(sandpaper) and draw pattern.
2. 시접은 0.7cm(상급자라면 0.6cm)남기고
자른다.
Cut leaving a margin to seam 0.7cm(If you were not a beginner, 0.6cm).
3. 사진과 같은 갯수가 나오면 됨
Prepare the number of fabric like this picture
주의사항: 식서방향에 주의
할 것! (원단의 원래 폭이 있는 쪽, 예를 들어 구멍이 뚤린 방향이 식서방향임)
패턴의
식서 방향과 구멍의 줄을 맞추어서 패턴을 그려준다. (늘어남이 덜한
부분이 식서)
|
|
|
|
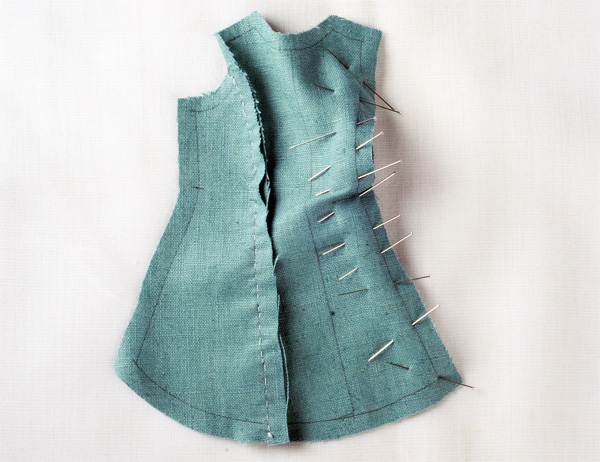
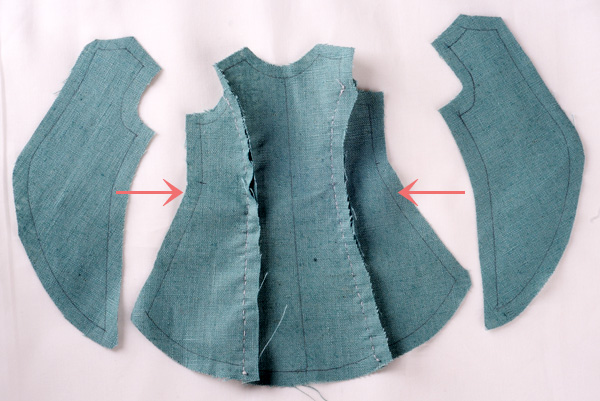
4. Front center에 font를
좌,우 대칭으로 붙인다. (미싱이 서툰 분은 손 바느질 가능)
Sew Font to Front Center symmetry.(It's OK if you don't use a sewing machine)
|
|
|
|
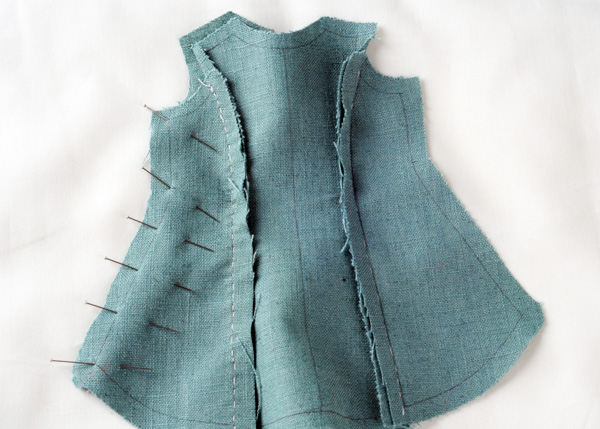
5. Back의 모양에 유의하여
front에 붙인다.
Sew Back to Front.
|
|
|
|
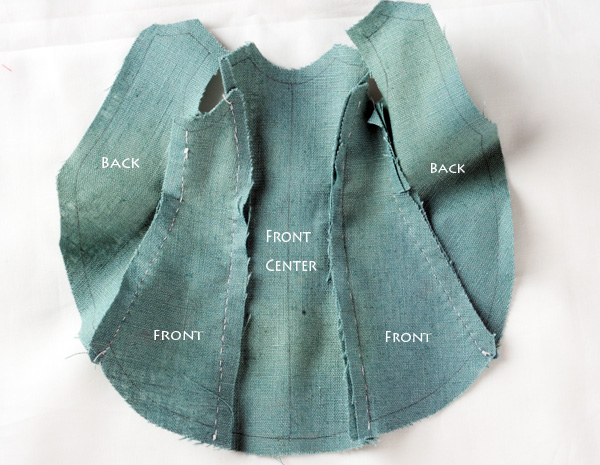
6. 시침핀 사용을 귀찮아하지
않기!
Use pins!
|
|
|
|
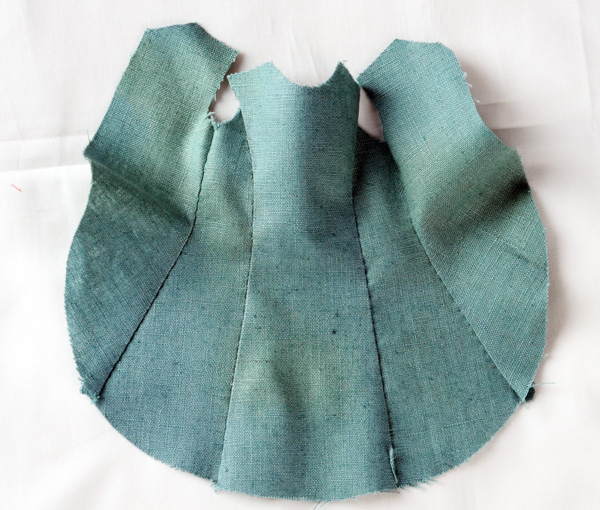
7. 연결된 모양
Like this.
|
|
|
|
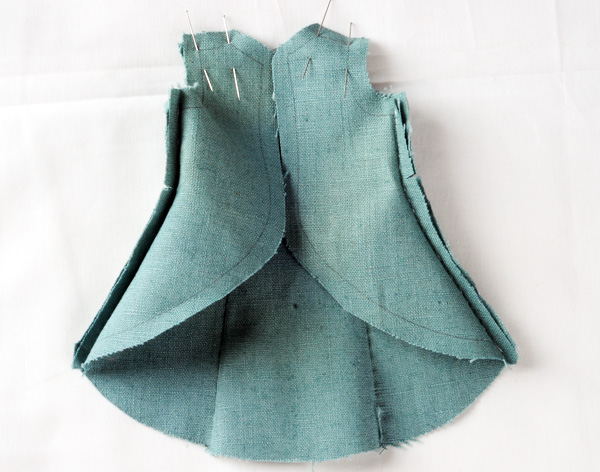
8. 겉에서 본 모양 (다림질
후)
The outside. (After ironing)
|
|
|
|
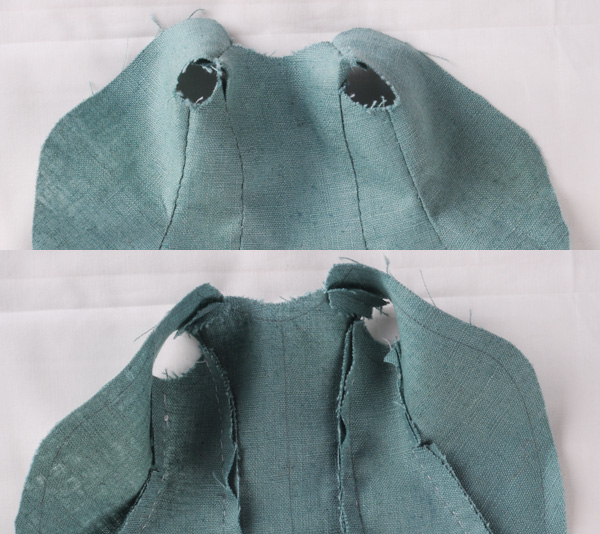
9. 어깨를 시침핀으로 고정
후, 박아준다.
Be fixed shoulder by a pin, and sew.
|
|
|
|
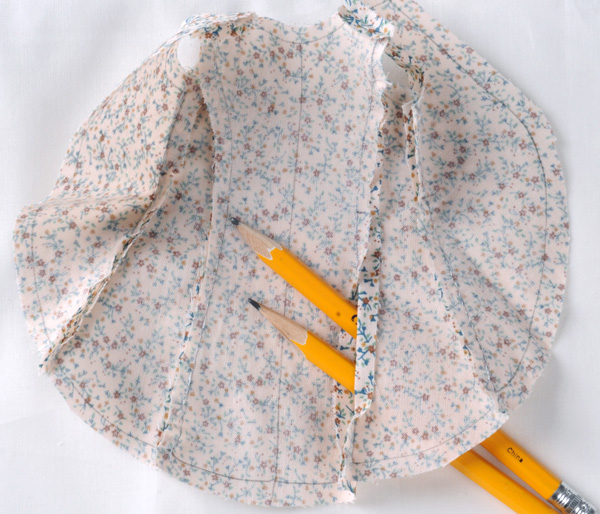
10. 박아진 모양 (시접은
가름솔 처리)
After sewing.
|
|
|
|
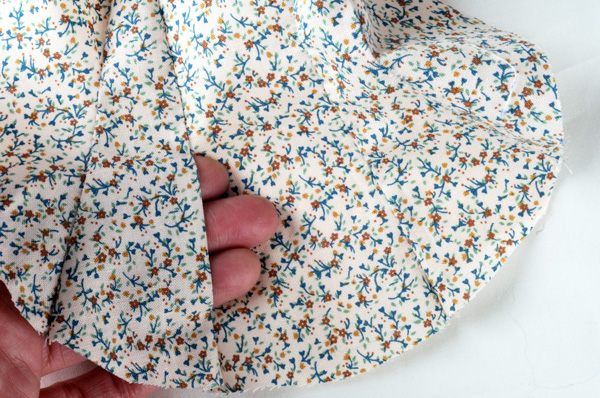
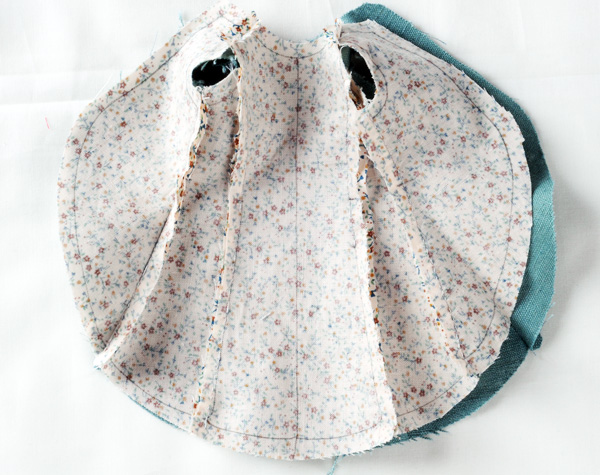
11. 속감도 겉감과 같은 방법으로
박아준다. 다만 옆솔기 부분에 창구멍 만들기.
Sew lining up following the pattern of out shell. Don't forget leaving small opening at the side seam.
|
|
|
|
12. 창구멍 보이죠? 손가락
세 개 정도 통과하도록 ~
3fingers can enter into the small opening. Like this :)
|
|
|
|
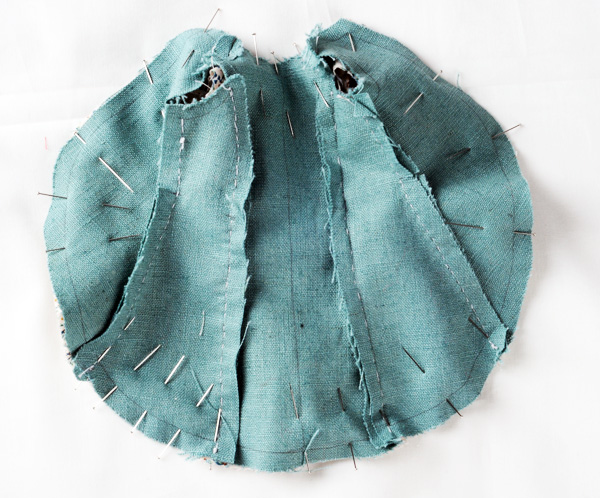
13. 겉감과 속감의 겉면과
겉면이 마주보도록 배치
Arrange out shell's the right sides to lining's the right side.
|
|
|
|
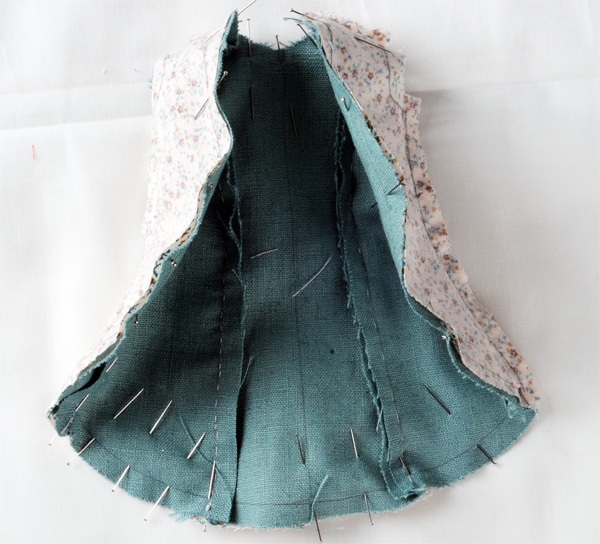
14. 시침핀 꽂기
Pin
요령:
시침핀을 꽂는데도 요령이 있다. 우선 겉감과 안감의 재봉선이 만나는
부분을 먼저 시침핀으로 고정한 후,
시침핀과 시침핀 사이를 시침핀으로
꽂고, 또 시침핀과 시침핀 사이를 꽂아준다. 이런 식으로 하다보면 원단이
밀리거나
만의 하나 주름이 생기더라도 골고루 퍼지게 배치할 수 있음.
|
|
|
|
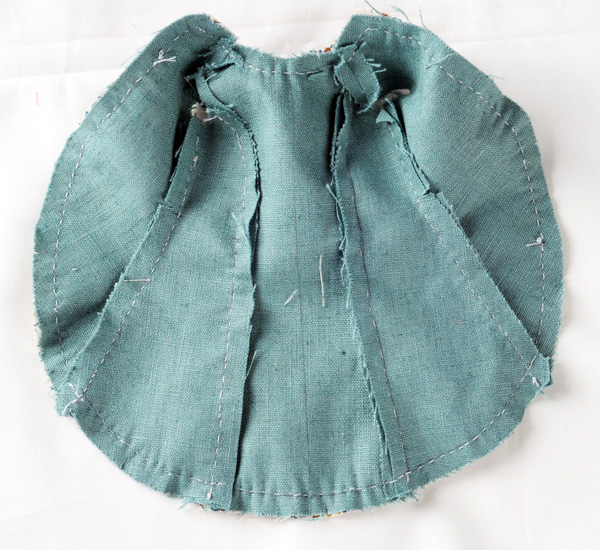
15. 겉과 안을 비교해가며
재봉선에 맞추어 핀이 잘 꽂혀졌는지 확인
Check the outside and the inside.
|
|
|
|
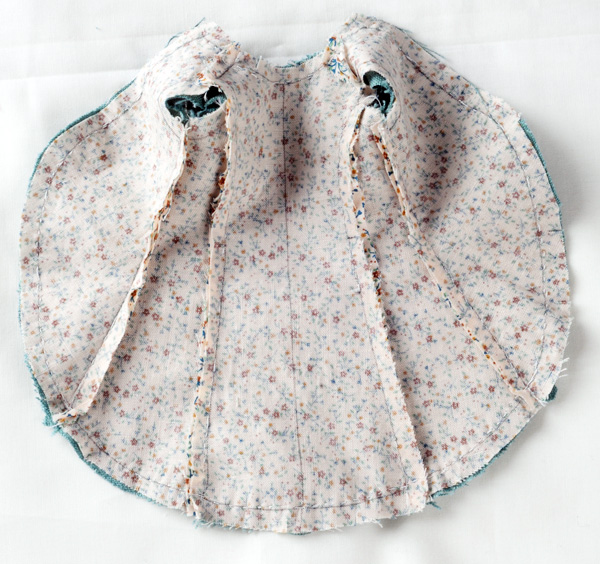
16. 급한 마음에 빨리하느라
바느질 선은 예쁘지 않지만....^^;
I sewed fast, so lines are not very neat...:P
|
|
|
|
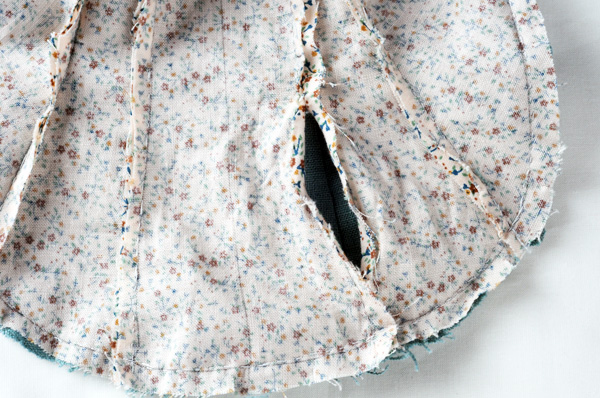
17. 이렇게 곡선이
많은 패턴의 경우는 재봉틀 사용보다는 손 바느질이 결과물이 예쁠 수
있다.^^
Doing needlework is better than a sewing machine when sew curved pattern.
|
|
|
|
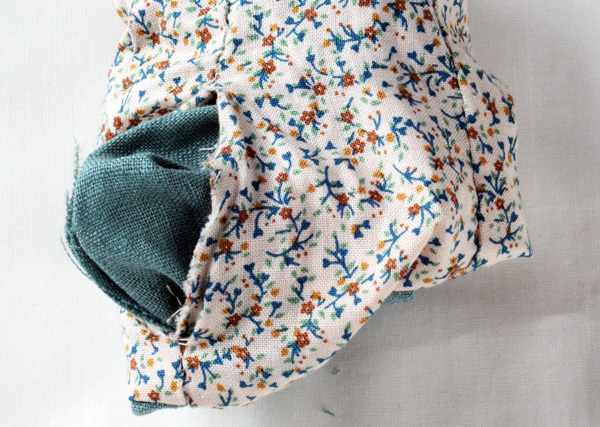
18. 안감 옆솔기 부분에 창구멍 보이죠?
You can see a small opening at lining's the side seam.
|
|
|
|
|
|
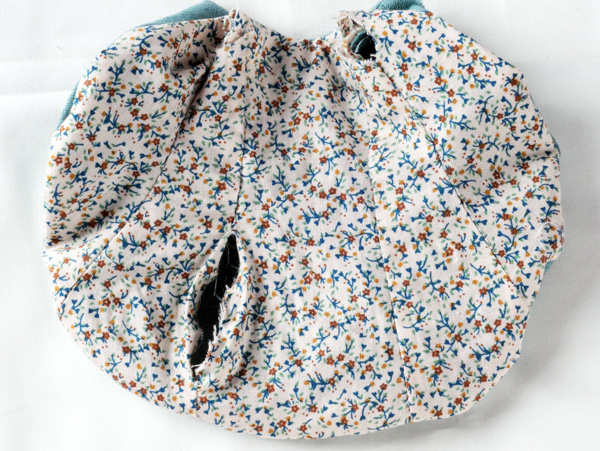
19. 창구멍으로 뒤집기
뒤집기
전, 곡선 부분은 가위집을 내주면 곡면이 예쁘게 처리됨. ^^
Turning inside out through opening.
You can make nice curve if you make small notch before you do that.
|
|
|
|
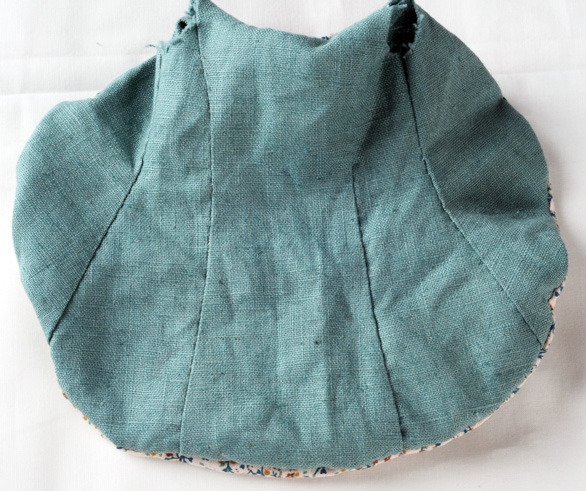
20. 이렇게 뒤집힘.지저분함...
Turn sth inside out.
|
|
|
|
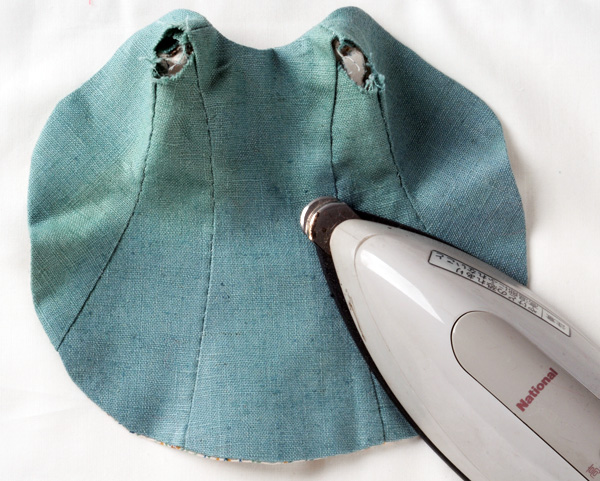
21. 앞 모습은 더 쭈글쭈글~
Crumpled front.
|
|
|
|
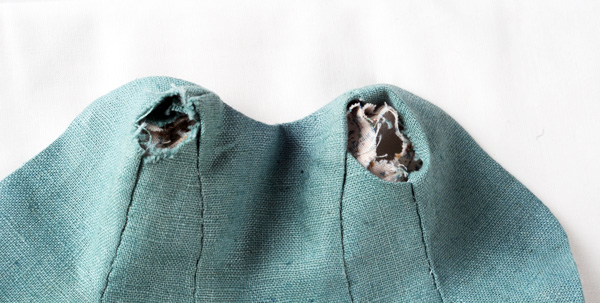
22. 다림질로 펴준다.
Ironing.
|
|
|
|
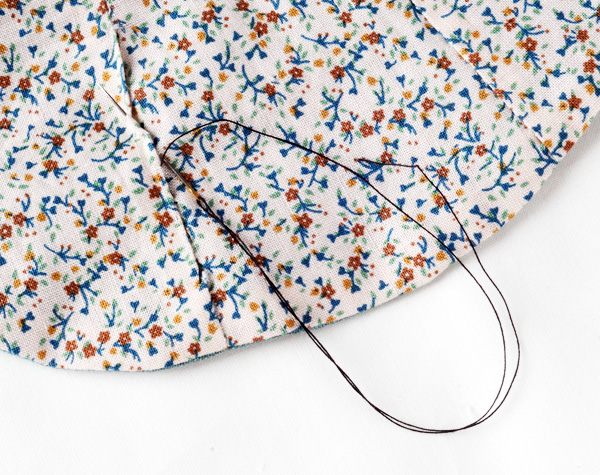
23. 창구멍은 공그르기로 마감
Sew up opening with an invisible seam
|
|
|
|
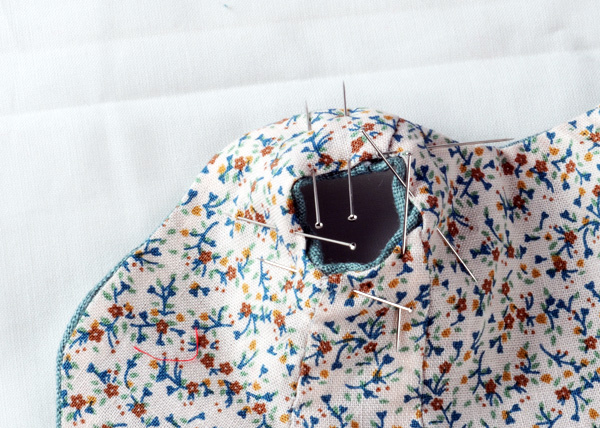
24. 소매는 시접을 안으로
접어준다.
Sleeve, fold a margin to seam on the inside.
|
|
|
|
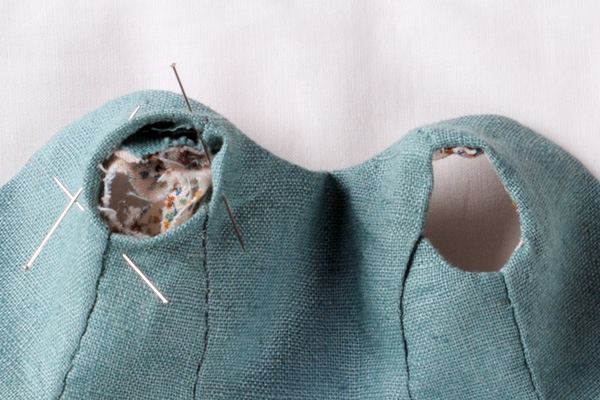
25. 겉감도 안으로, 안감도
안으로 접어서 시침핀으로 고정후 공그르기한다.
Fold out shell and lining on the inside. And pin then sew up with an invisible seam.
|
|
|
|
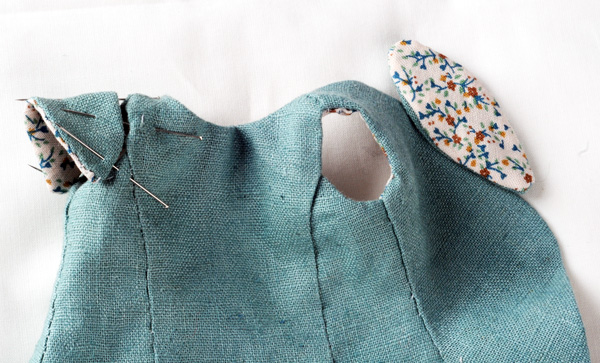
26. 오른쪽 암홀 부분은 공그르기가
끝난 모양. 왼쪽 암홀부분은 시침핀으로 고정하고 있는 모양
The blind stitch of right armhole already done. Left armhole being basted with pin.
|
|
|
|
27. 소매는 겉감과 안감을
겉과 겉이 마주보게 배치한 후 창구멍 남기고 박아준다.
Stitch outshell and lining right sides of sleeve together leaving small opening.
28. 뒤집은
뒤 공그르기로 마감.
Turn over and sew up with an invisible seam.
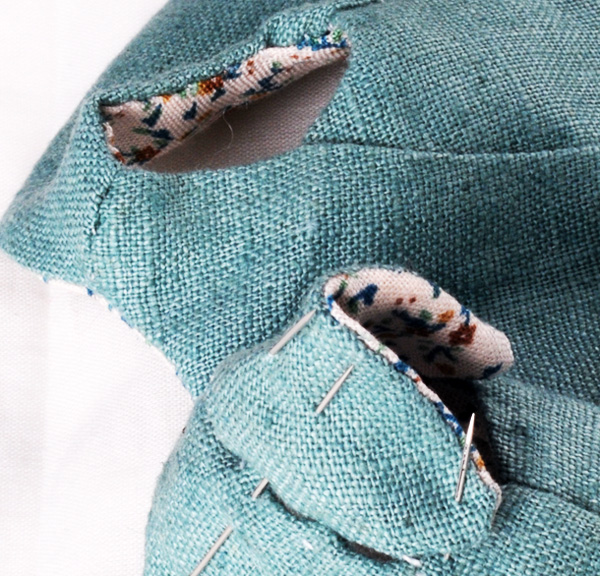
29. 암홀부분에 소매를 배치 한 뒤, 공그르기로
붙인다.
Arrange sleeve to armhole, and sew up with an invisible seam.
|
|
|
|
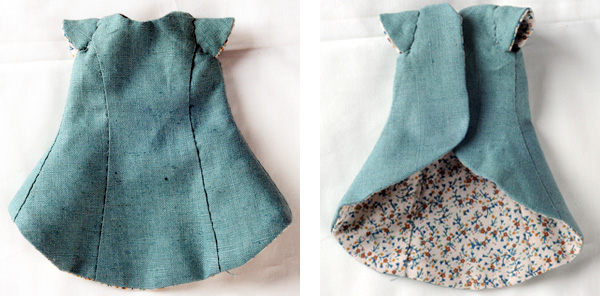
30. 확대 사진.
An enlarged photo
|
|
|
|
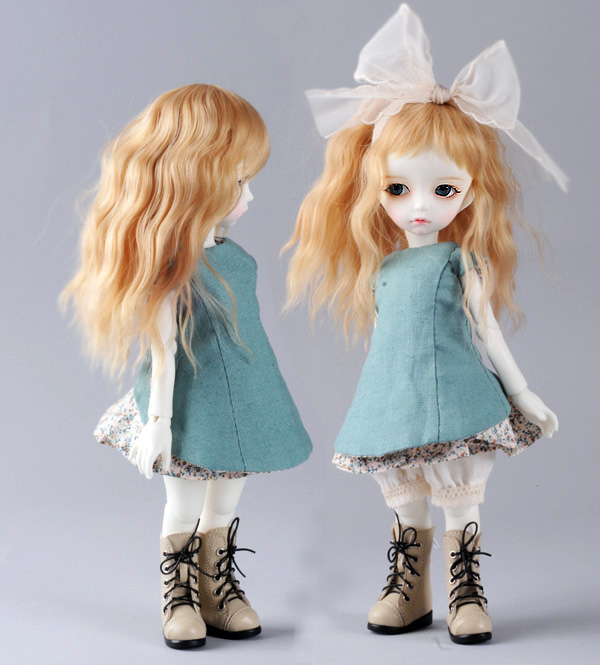
31. 완성된 아우터 드레스의
앞면과 뒷면 사진 (아무래도 소매가 좀 엉성해 보임. 급하게 하느라
ㅡㅡ;;)
Front and back photoes of outer dress. (Sleeve looks little weird....because of the fast speed.)
|
|
|
|
32. 모딜리가 입고 기념 사진
한방~~ ^^ (안에 입은 펌프킨 팬츠는 프리패턴으로 제공됨. ^^ )
Modigli dressed in Outer Dress :)
|
|
|
![]() INCLUDING :
INCLUDING : ![]() Please refer to the
sewing room for details.
Please refer to the
sewing room for details.![]() The color in the image could look slightly different from
the actual product.
The color in the image could look slightly different from
the actual product. 


